Friday, 18 April 2014

Malpua Recipe

03:03 Posted by Unknown , No comments
Malpua Recipe ~ Indian Sweet Dishes (Holi Recipes)
malpua recipe
Malpua
Malpua recipe is not as daunting as it seems. Malpua is an Indian sweet dish that is basically a sugar syrup soaked pancake prepared from a batter of flour, milk and cardamom. These pancakes are usually fried in ghee till crisp along the edges, soaked in sugar syrup, garnished with pistachios and served warm with a topping of Rabri aka rich thickened milk. There are many variations of Malpua based on the region it is prepared. In Orissa, it is served as prasad to Lord Jagannath while the people of West Bengal, Uttar Pradesh, Maharashtra make it for festivals like Sankranti and Holi. A popular variation of the Malpua batter is to add grated coconut and ripe bananas which yields a soft and spongy pancake.
how to make malpuamalpua preparation
How to make Malpua ~ Step by Step
how to make mawa malpuamalpua sugar syrup
With Holi round the corner, I decided on Mawa Malpua recipe for my dear readers. A rich variation is the mawa malpua where mawa or unsweetened khoya is added to the batter. These rich pancakes are also immersed in sugar syrup flavored with saffron and served with rabri. Serve your family and friends this soft textured heavenly dessert along with other special Holi special recipes like Gujiya and Thandai.
malpua with rabri
Mawa Malpua with Rabri

Malpua Recipe

Prep time: 30 min
Cook time: 60 min
Yield: 12
Main Ingredients: flour mawa

Ingredients

  • Plain Flour - 1 cup (maida)
  • Mawa - 1/2 cup (unsweetened khoya) a little less than half cup will also do
  • Saunf powder - 1/4 tsp (optional)
  • Cardamom powder - 1/2 tsp
  • Salt - pinch
  • Sugar - 1 tbsp
  • Milk - 2 cups
  • Ghee - 1/2 cup for frying (you can use oil also)
  • Pistachios - fistful, sliced
  • Almonds - 8-10, blanched, peeled and slivered
  • Saffron - 7-8 strands
  • For sugar syrup:
  • Sugar - 3/4 cup
  • Water - 1/3 cup
  • Cardamom powder - 1/4 tsp
  • Saffron - 4 strands

Method

  1. Bring the milk to a boil and simmer till it reduces to 1 1/2 cups. Turn off flame and allow to cool to luke warm temperature.
  2. In a bowl, add khoya and half of the boiled milk and mix till it is smooth. Add cardamom powder, saunf powder, sugar, salt and few strands of saffron and mix well. Add half of the flour and mix well till there are no lumps.
  3. Add the remaining flour and mix well. Slowly add the milk till it forms a smooth flowing batter as shown in the picture above. Keep mixing the mixture for 3-4 mts and set aside till you make the sugar syrup.
  4. To prepare sugar syrup, add sugar and water in a stainless steel vessel and allow the sugar to melt . Simmer the sugar syrup for 10-12 mts on low medium flame. Add cardamom powder and turn off heat. Set aside.
  5. Heat ghee in a small vessel or pan on low medium flame for 3-4 mts. Pour a small ladle full of batter in the center of the pan without spreading it. The batter will spread on its own. Do not try to touch the pancake till it starts to turn golden along the edges. It will slowly get immersed in the ghee and cook on medium flame till the sides are golden brown.
  6. Flip it over and cook on medium flame for another 2-3 mts or till it turns golden brown. Use a slotted spoon to drain the Malpua and place it in the sugar syrup immediately. Fully immerse the Malpua in the sugar syrup and let it sit for half a minute. Remove with a slotted spoon such that the sugar syrup drains off the Malpua and then place it on a serving plate.
  7. At the time of serving, place malpua on a serving plate. Spoon some rabri on top of the malpua and garnish with chopped pistachios and almond slivers.

Tips

  • If more milk is required to make the malpua batter, do add more. Add milk as required for a flowing batter.
  • If the batter has become too thin, you add a few tbsps of flour to thicken it.
  • If making a large batch, use a wide heavy bottomed vessel and you can fry 5-6 malpuas at a time. You can use oil to deep fry the Malpuas.
Malpua recipe is one of the special Holi sweet dishes among Indian recipes that is best served with rabri or rabdi.Learn how to make Rajasthani Mawa Malpua.

Gujiya Recipe

03:02 Posted by Unknown , No comments

Gujiya Recipe

Print version of Gujiya Recipe
Gujiya Recipe ~ Holi Special Dishes Recipes
gujiya recipe
Gujia ~ Holi Special
Today I have for you Gujiya recipe which is a Holi special sweet like MalpuaThandai and the likes. It is made in most parts of India and goes by different names like Ghugra, Karanji (Maharashtra), Pedakiya (Bihar) and Nevries (Goa). Gujiya is what we Andhras call Kajikayalu, the recipe of which I have blogged earlier. Both Gujiya and Kajikayalu follow the same recipe and procedure. The filling for Gujiya and Kajikayalu is a mixture of roasted dry coconut, nuts, khoya or sooji (semolina), cardamom powder and powdered sugar.
Gujiya is not an overly sweet dish. It has a crispy, flaky exterior with a cardamom flavored sweet filling. Today, am blogging Mawa Gujiya where unsweetened khoya is used in place of sooji (semolina). It can be stored at room temperature upto two weeks.
gujiya preparationgujiya mawa filling
how to make gujiyarecipe of gujiya
Gujiya Recipe ~ Step by Step
So, now that you have the recipe of Gujiya on hand, are you going try it this Holi? :)

Gujiya Recipe Recipe

Prep time: 45 min
Cook time: 20 min
Yield: 20
Main Ingredients: flour mawa coconut

Ingredients

  • Plain flour - 2 cups
  • Ghee - 4 tbsps, melted (clarified ghee)+ 3 tbsp for roasting filling ingredients
  • Water - as required to knead the dough
  • Salt - 1/2 tsp
  • Oil for deep frying
  • For the filling:
  • Dry coconut - 1/2 cup
  • Mawa - 1/2 cup (you can use semolina or putnala pappu/roasted chick peas in its place)
  • Powdered sugar - 3/4 cup
  • Cardamom powder - 1 tsp or nutmeg powder - 1/4 tsp
  • Pistachios - fistful
  • Cashew nuts - fistful
  • Almonds - fistful (blanched and peeled)

Method

  1. In a bowl, add the flour, salt and ghee and rub with your palm and fingers such that the dough appears like bread crumbs. Add jut enough water to make a pliable yet FIRM dough. Divide the dough and shape into small balls. Keep aside covered for half an hour.
  2. Meanwhile, heat a pan, add 1/2 tbsps ghee, add the grated coconut and roast over medium flame for a few minutes, approx 5 mts till it turns golden brown. Remove and keep aside. If using fresh coconut, roast the coconut till there is no moisture. Ensure that its well roasted, it takes longer time to roast than dry coconut.
  3. In the same pan, add a tbsp ghee, add the nuts and roast till golden. Remove and cool. Once cool, make a coarse powder and set aside.
  4. In the same pan, drizzle 1/2 tbsp of ghee and add the khoya/mawa and roast for 5-6 mts. Remove, keep aside to cool.
  5. Powder the sugar and mix with the roasted dry coconut, ground nuts and mawa. Add the cardamom powder and mix well. Set aside the prepared filling.
  6. Now, roll each ball with the rolling pin into a thin puri of approx 31//2" to 4" in diameter.
  7. Spread a tablespoon of the filling on one half of the rolled out dough. Wet your finger and run it along the edges of the spread out dough with water and fold over to the opposite end, enclosing the stuffing to form a semi-circle shaped gujiya. Press the ends firmly so that the filling doesnt come out during the deep frying process and use a fork to seal the edges. Alternately you can twist the edges around the gujiya.
  8. Heat enough oil in a wide vessel to deep fry the stuffed kajjikayalu. Slowly drop 3-4 gujiyas into the oil and deep fry them on medium flame till golden brown. Turn them carefully to cook the other side as well. Drain the gujiya with a slotted ladle and remove to a plate.
  9. Cool and store in air tight containers. Gujiya remain fresh for atleast a week and can be stored utp 2-3 weeks.

Tips

  • For a sweeter flavor, you can immerse the deep fried gujiya in sugar syrup for a minute and drain.
  • Garnish the gujias with almond slivers and pistachios while they are warm and moist with the sugar syrup. Once the gujiyas dry, they can stored in an airtight container upto 3 weeks.
  • Make the gujiya in batches. Roll out, stuff and deep fry 3-4 gujiyas at a time (batch-wise). While preparing the next batch of gujiya, reduce the stove flame and carry out the process. When deep frying the next batch, see that the oil is hot enough to deep fry. Keep the dough covered through out the preparation process.
  • Sugar can be replaced with powdered jaggery.
  • Gujiya moulds are available in the market and can be used to shape the gujiya after rolling out the puri.
  • One of the variations for the filling is it to use khus-khus or poppy seeds in place of sooji, roast 4 to 5 tbsps of khus khus and use.
  • Another variation is to use powdered dalia aka putnala pappu (roasted chick peas) in place of sooji along with dry coconut and sugar.
  • If you do not have dry coconut on hand, you can use roasted and powdered sesame seeds.

Gujiya recipe, a classic Indian sweet among Holi special dishes. Learn how to make Mawa Gujiya that has a filling of mawa, coconut, nuts, sugar & cardamom.

Phirni Recipe

03:01 Posted by Unknown , No comments

Phirni Recipe


Phirni Recipe ~ Easy sweet recipes to make
phirni recipe
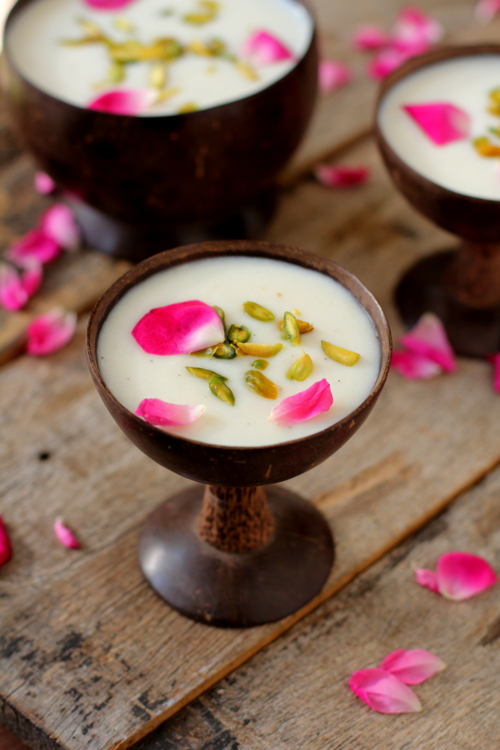
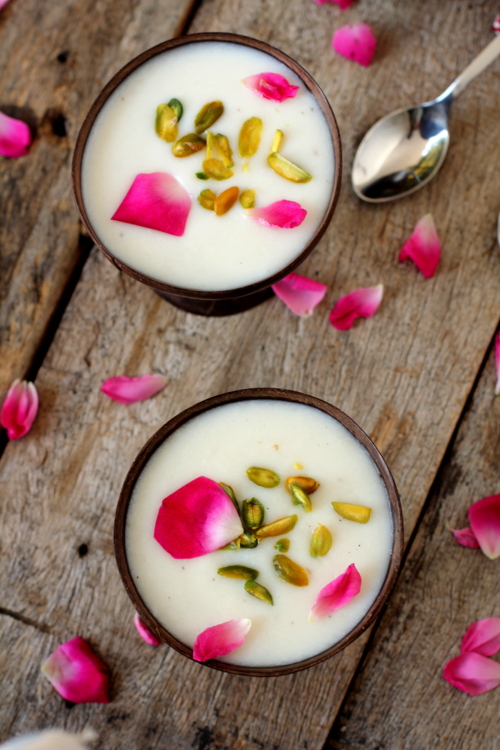
Phirni
Phirni recipe is a traditional Indian rice pudding that is prepared with full cream milk, paste of soaked raw rice, sugar and cardamom. The cooked creamy rice mixture is set in earthen clay pots or plates, richly garnished with edible silver leaf and garnished with nuts like pistachios and almonds. Phirni or Firni has its origins in the Middle East and has made its way to the Indian sub continent through the Mughals. You will find this easy sweet dessert prepared in the homes of Hindus and Muslims to celebrate festivals like Eid, Holi and Diwali.
Phirni is one of the easy sweet recipes to make for a beginner with minimal ingredients. Variations to the basic Phirni recipe are endless with the most popular ones being Badami Phirni (flavored with almonds), Kesari (saffron), Gulab (rose), Pistachio, Aam (mango), Strawberry and Chocolate. If you are running out of time and looking for a short cut method to make Phirni, use rice flour instead of soaking and grinding the raw rice with milk.
phirni
Indian sweet ~ Firni

Phirni Recipe Recipe

Prep time: 10 min
Cook time: 45 min
Yield: 5
Main Ingredients: rice milk

Ingredients

  • Basmati rice - 1/3 cup (minus 1 tbsp of rice), soaked for 20 mts in water, drained and ground to a fine paste adding 1/2 cup milk
  • Full cream milk - 4 cups
  • Sugar - 1/4 cup + 2 tbsps
  • Green cardamom powder - 1/2 tsp
  • Pistachios - fistful, blanched, peeled and sliced
  • Rose petals - few (optional)
  • Saffron - 8-9 strands (optional) soak in 2 tbsps of milk

Method

  1. Bring the milk to a boil in a heavy bottomed vessel. Simmer till it reduced to 3/4 th of its original quantity.
  2. While the milk is simmering, drain the soaked basmati rice and grind to a fine paste add 1/2 cup of the boiled milk. Remove to a vessel, mix well and set aside.
  3. After the milk has reduced to 3/4th of its original quantity, slowly add the ground rice mixture and keep on stirring till it blends well into the milk and it starts to thicken.
  4. Keep on stirring so that the bottom does not burn. The stirring could take anytime between 12-15 mts. Add cardamom powder and sugar and continue to stir till the sugar dissolves and it forms a nice creamy mixture with no lumps. Turn off flame.
  5. Remove to a serving bowl and chill until serving time. At the time of serving, ladle the phirni into serving bowl, garnish with sliced pistachios and rose petals.

Tips

  • 1/4 sugar is usually enough but for a sweeter Phirni, you can add another 2 tbsps of sugar.
  • If using saffron, add it to the milk mixture at the time of adding cardamom powder.
  • If your Phirni has turned too thick, you can loosen it have adding a few tbsps of boiled milk.
Phirni recipe, a rice & milk based dessert is a gem among Punjabi recipes. Recipe of Phirni is categorized under Indian sweet recipes that are easy to make.

Shikampur Kebabs – Minced mutton-based lentil patty

02:58 Posted by Unknown , No comments

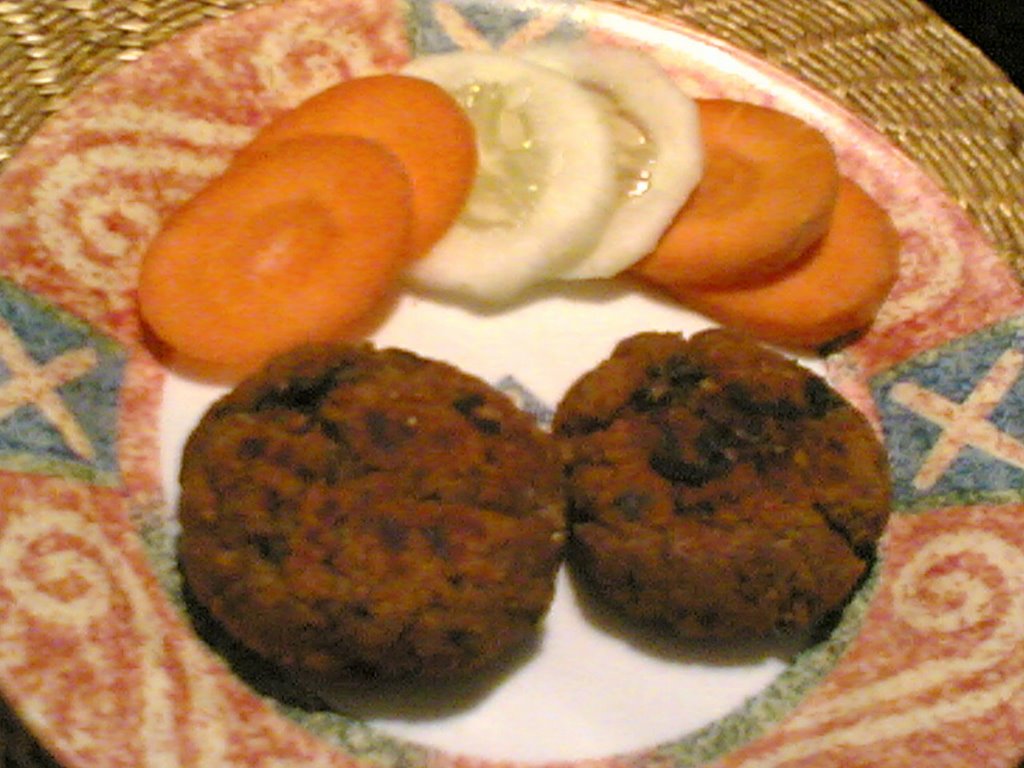
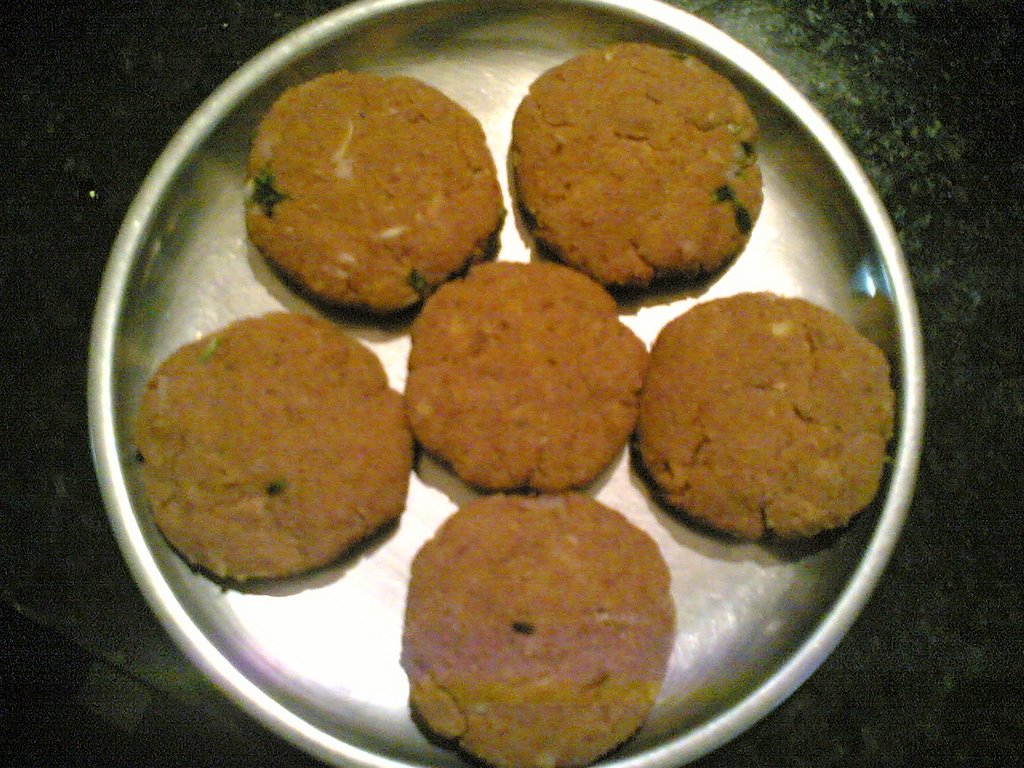
Shikampur Kebabs – Minced mutton-based lentil patty


Hyderabad (capital of Andhra Pradesh) and Lucknow (capital of Uttar Pradesh) are the two cities in India where the “kebab” evolved. When and Who introduced the ‘kebab’ to India is another story which requires a separate post by itself..so let me reserve that for later.
Lucknow is famous for its kebabs and you will find the great great grandsons of bawarchis(Chefs) to the Nawabs(Kings) carry on the culinary tradition of their forefathers in their dhabas till today. Lucknow’s richly flavoured Avadh cuisine is specially known for the quality and quantity of spices used in cooking meat dishes.Murg tikka,fish tikka,paneer kebab,seekh kebab,kacche keeme ki kebab,kalmi kebab and tangiri kebab to name a few, are the famous Lucknowi mouthwatering array of specialities.
Hyderabad,our capital city,is the home of the Muslim Nawabs(rulers) and is famous for it’s Dum Biriyani,simply irresistable grilled kebabs, kurmas and the famous Shikampur Kebab (mutton mince cooked with cumin,cloves and cinnamon and bengal gram lentil and stuffed with cottage cheese,mint,onions and green chillies) and gently grilled on a griddle or tawa with pure ghee.Shikampur means ‘belly-full’ referring to the stuffing in the centre of the kebab.The famous Shammi Kebab of Lucknow is same as Shikampur Kebab without the stuffing.
Ingredients:
500 gms kheema (minced meat)
1/4 cup of Bengal gram lentil(soaked in water for 1/2 hr)
10 cloves garlic
1 tsp cumin seeds
5 pods green cardamom
2 sticks cinnamon
5 cloves
1/4 tsp turmeric pwd
1 tsp red chilli pwd
2 tbsp oil/ghee(clarified butter)
1 1/2 cup water
Mix all the above ingredients and bring to a boil and then bring to medium heat for 2 mts before reducing to low heat until all the water evaporates and the meat and dal is cooked.Stir occassionally to prevent burning.
Then add salt and blend in a mixie and knead it like a dough.Shape into round pattis.
For filling:
3 tbsp finely chopped onions
2 tbsp finely chopped fresh mint leaves
3 tbsp grated yogurt cheese
4 deseeded and chopped green chillis
salt
Mix all the ingredients for the filling.
Flatten the pattis and put a tbsp of the filling in the center and reshape into a patti.Refridgerate for 20-25 mts.

Pre-heat a griddle adding 2 tbsps of oil/ghee and shallow fry 3 kebabs at a time.Let them cook on low heat to medium heat.Flip over and brown both sides till golden brown.
Serve with salad,onion rings and lemon wedges.

Charcoal Grilled Pomfret (With Traditional Indian Earthen Stove)

02:57 Posted by Unknown , No comments

Charcoal Grilled Pomfret (With Traditional Indian Earthen Stove)

Print version of Charcoal Grilled Pomfret  (With Traditional Indian Earthen Stove)
With summer here, its barbeque time..:). I bought a new traditional earthern cooking stove a couple of days ago, called “Kumpati” in Telugu, where charcoal and firewood is used as a medium to cook food and is a popular stove with our rural folks. Kumpati, to us, serves as our “charcoal barbaque” and used often during summers to prepare chicken tikka, tandoori chicken and paneer tikkas. Its not like a typical tandoor but can be used as one and does serve the purpose of a tandoor to a certain extent. Kumpati basically uses “charcoal” as a cooking medium and the intense heat created by the hot coal cooks the food or meat very quickly giving it a crisp exterior and a soft and juicy interior and serves as a homestyle tandoor.
KumpatiTraditional barbaque
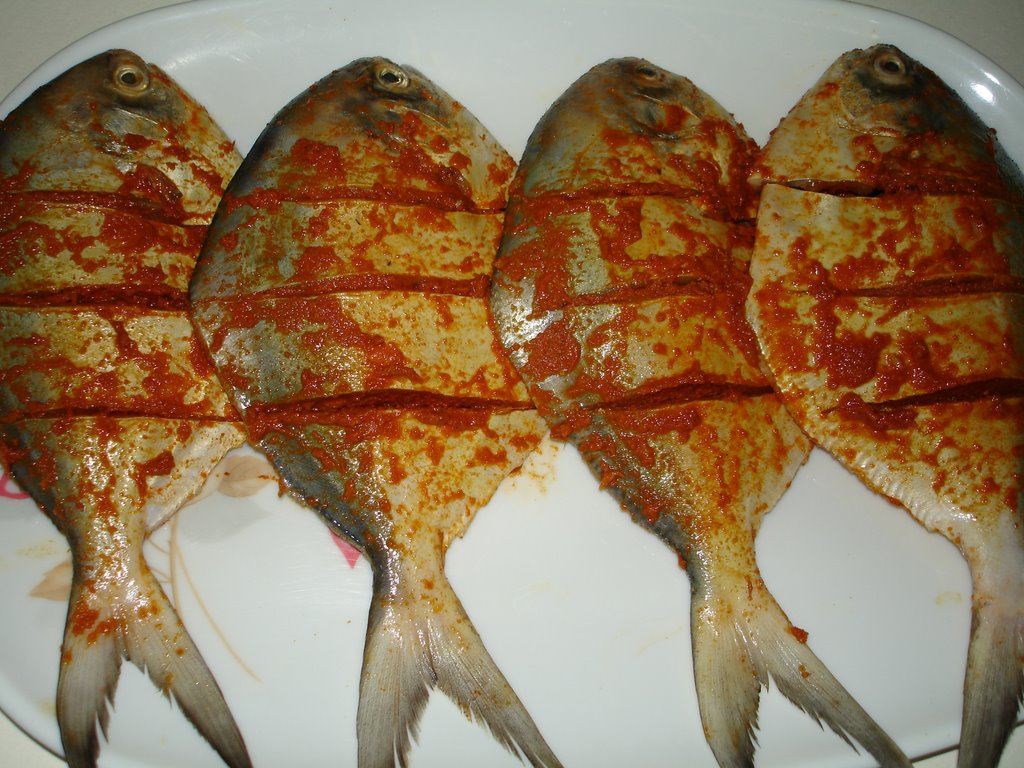
This cooking stove made of clay, has a hole in the front to feed the fire and holes on the top which act as burners. We can cook food directly over the coal embers or place a cooking vessel or pan over the hot coals to cook the food. Since its made of clay it holds in the heat and the food is cooked quickly. This morning when we went for our walk along the beach road, we found some fishermen hauling their nets with a fresh catch of fish. We bought some fresh white pomfrets and I cleaned and marinated them in the morning keeping in mind that we could have a barbaque dinner later in the evening. Satish is a very willing and enthusiastic helper especially with barbaques. He helped light up the coals and got the “kumpati” ready to cook the fish in a jiffy..:)
Tandoori Pomfret
Charcoal Grilled Pomfret Recipe
Ingredients:
4 big white pomfrets (chanduva or mackarel)
juice of one lemon
1 tbsp ginger garlic paste
big pinch turmeric pwd
1 tsp red chilli pwd
1 tsp coriander pwd
1/2 tsp cumin pwd
salt to taste
Wash, clean and dry the fish. Make slits on the fish and marinate it in salt and lime juice for 10 minutes.Meanwhile mix together ginger-garlic paste, turmeric pwd, chilli pwd, coriander pwd and cumin pwd and apply this paste to each of the fish and keep aside for atleast 2-3 hours. You can adjust the spiceness of the marinade according to your choice. I marinated the fish for around 10 hours and refrigerated it. Remember fish or meat marinated over a longer period tastes best as it absorbs the flavors well.
Half an hour before you actually want to eat your dinner, get your kumpati (stove) up and ready by lighting up the charcoal and you should have red hot burning embers of coal like shown in the picture.
Burning coal - kumpati
Grease a grill or hot plate with big holes (like the one shown in the picture) and place the marinated fish (brush oil over the fish before placing it on the hot plate) over it and place the hot plate over the kumpati or hot stove.
Let it cook for 3-4 minutes and then turn the fish on the other side and let it cook for another 3-4 minutes or till golden brown. The real secret to grilling these pomfrets is to not overcook them. Watch closely as you cook the fish …grill hot and fast and take it off the heat as soon as you can.
Pomfret cooking
You have a perfectly cooked moist fish with a mellow smoky flavor ready to be devoured. Serve hot with slices of lemon wedges, salad and chutney.
Note:T his fish tastes best when cooked in a tandoor or on a charcoal barbecue or kumpati. However if these methods of cooking aren’t available then use a grill or bake in the oven.
The spices used in the marination for cooking the pomfret differs region wise and the marinade for this particular fish is one which is popular in our home. I use different marinades using yogurt, garam masala and other spices each time I cook fish.
Grilling/roasting over charcoal heat or tandoori cooking calls for very little fat or oil and the smoky flavor enhances the taste of the food cooked. So if you want to cook some low calorie foods, investing in a grill or home tandoor does make sense. So all you weight watchers out there, here’s a very simple, low calorie, healthy, flavorful seafood Indian appetizer (cooked with minimal fat) that you will find hard to resist..:).

Charcoal Grilled Pomfret (With Traditional Indian Earthen Stove) Recipe

Prep time: min
Cook time: min
Main Ingredients:
With summer here, its barbeque time..:). I bought a new traditional earthern cooking stove a couple of days ago, called “Kumpati” in Telugu, where charcoal and firewood is used as a medium to cook food and is a popular stove with our rural folks. Kumpati, to us, serves as our “charcoal barbaque” and used often […]

Paneer Fajitas

02:56 Posted by Unknown , No comments

Paneer Fajitas

Print version of Paneer Fajitas
Today, I made a Mexican inspired appetizer, Paneer fajita (fah-he-tah) which is very simple and tasty – just marinate, grill and eat! With the onset of summer, these fajitas make a great appetizer for barbecues or an evening tiffin for our kids, a great way to get them eat vegetables and remember, its a healthy snack. The best part of fajitas is they can be made with practically anything, vegetables, meat, chicken and seafood. I love that!-:)
Paneer Fajitas
The traditional method of preparing the fajitas is by grilling them, but they can also be pan fried and if using meat, oven broiling works (meat requires more marinating time than vegs and paneer). Its the marinade which holds the key to a good fajita. Vinegar or lemon juice is a must to lend a sour flavor. As told by a chef friend who used to work at a multi cuisine food joint – “experiment with anything which has a sour flavor like orange juice or even a coke”. Well, I haven’t got that creative yet.:).
I’d love to learn more about marinades for fajitas if you’d like to share. Tried and tested recipes of fajitas (veg/non-veg) are also welcome..:).
Paneer fajitas baked
Paneer Fajitas Recipe
Prep & Cooking: 15 mts, marinate time: 30 mts
Makes approx 15-20 fajitas
Cuisine: Mexican inspired
.
Ingredients:
1/4 kg paneer, squares
juice of 1 lime
1 tbsp olive oil
salt to taste
2 tbsps red chilli flakes
1 tsp mustard pwd
1 tbsp Worcestershire sauce (optional)
pinch of cumin pwd
2 tbsps sesame seeds
1/2 tsp dried parsley
For salad:
1 onion, finely sliced
1 capsicum, finely sliced
1 tomato, finely sliced
fistful boiled green peas
fistful boiled sweet corn
a small cup of finely sliced cabbage
fresh parsley for garnish
salt to taste
pepper to season
1 tsp lemon juice (optional)
1 Marinate the paneer squares with lemon juice, olive oil, worchestshire sauce, cumin pwd, mustard pwd and dry parsley and salt for 30 mts.
Marinated paneer along with seasame seeds and chilli flakes mixture
2 Combine sesame seeds and chilli flakes in a small bowl. Coat both the sides of the paneer in this and place them on a greased baking tray or a grill.
3 Grill the paneer in a pre-heated oven for 10 mts, till the paneer attains a light brown shade.
4 Saute the vegetables for salad, season with salt, arrange on a serving plate, sprinkle some parsley on top and place the grilled paneer fajitas on the salad. Serve hot with salsa.
Paneer fajitas served on a bed of salad

I, in turn, learnt it from one of her student, Alka.

Paneer Fajitas Recipe

Prep time: min
Cook time: min
Main Ingredients:
Today, I made a Mexican inspired appetizer, Paneer fajita (fah-he-tah) which is very simple and tasty – just marinate, grill and eat! With the onset of summer, these fajitas make a great appetizer for barbecues or an evening tiffin for our kids, a great way to get them eat vegetables and remember, its a healthy […]

Thai Stir fried Broccoli Chicken

Quick Summer Meals ~ Thai Stir fried Broccoli Chicken


Stir fried Broccoli Chicken with Homemade Mango Juice ~ Our meal today
I tried a Thai inspired sweet and savory sauce for a simple broccoli and chicken stir fry and it did not disappoint. The sauce included peanut butter that added sweetness, red chilli flakes gave a touch of spice while lemon juice provided the tang. The roasted red pepper and carrots went well with the chicken and broccoli and the final garnish of cherry tomatoes and toasted cashew nuts packed that extra punch.
Use seasonal vegetables and greens of your choice, shrimp can also be included while vegetarians can replace chicken with paneer or tofu. Makes for a perfect summer meal – quick (under 30 mts), healthy, light on the stomach and delicious! :)
Stir fried Broccoli Chicken Recipe
Prep & Cooking Time: 20-25 mts
Serves 4 persons
Cuisine: Thai inspired
.
Ingredients:
1/2″ ginger or galangal, julienne
1-2 garlic cloves, crushed
1 onion, cut into 8 pieces
1 carrot, julienne
1 red bell pepper, julienne
1 small head broccoli, blanch in hot water for 2 mts, drain competely
1 cup boneless chicken, cooked
1 tbsp oil
coriander leaves or parsley for garnish
4-5 cherry tomatoes for garnish
7-8 roasted cashew nuts for garnish
Stir fry sauce ingredients (combine)
3/4 – 1 tsp red chilli flakes
1/2-1 tsp light soya sauce
1/2 tbsp lemon juice or vinegar (adjust)
1-2 tsps honey or brown sugar
1 1/4 tbsps peanut butter
3-4 tbsps hot water
salt to taste
1 Heat oil in a large wok, once the oil is hot, add the ginger, garlic and onion and cook on high for a mt, constantly stir frying. Add the cooked boneless chicken and toss for 3-4 mts.
2 Add carrots and broccoli and cook for a mt on high flame. Add bell pepper and stir fry for 3 mts, tossing vegetables constantly lest they burn.
3 Adjust salt, spice and sweet flavors by taste testing the sauce. Add the prepared sauce mixture and toss all the vegetables till well combined with sauce. Combine well and cook for a mt on low flame till vegetables turn crisp tender.
4 Turn off heat, remove onto serving plate and garnish with toasted cashew nuts, cherry tomatoes and parsley or fresh coriander leaves.

Quick Summer Meals ~ Thai Stir fried Broccoli Chicken Recipe

Prep time: 10 min
Cook time: 10 min
Yield: 3
Main Ingredients: carrots bell peppers broccoli chicken peanut butter
I tried a Thai inspired sweet and savory sauce for a simple broccoli and chicken stir fry and it did not disappoint. The sauce included peanut butter that added sweetness, red chilli flakes gave a touch of spice while lemon juice provided the tang.